Neon Flower Nails
|
Supplies
- White nail polish
- Various neon nail polishes
- Silver nail polish
- Base/top coat
- toothpick
|
 |
Step 1
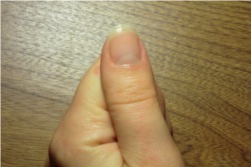
Apply a quality base coat (OPI, China Glaze, Revlon, Essie...) to all of your nails.
I'm using a Revlon base coat. This is essential to protecting your nails from staining.
Make sure your nails are fully dry before proceeding.
|
 |
Step 2
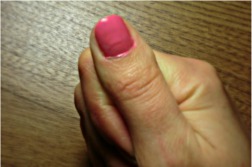
Paint all of your nails pink. The color should be a dark pink, not a light pink as it will not resemble watermelon, and fully opaque. The color I'm using is 220 Bubble by Revlon Top Speed. If your polish is not as vibrant, feel free to apply a second coat.
|
 |
Step 3
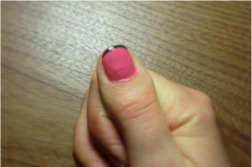
Now, you need to paint a thin dark green "french tip", the key word is thin.
This is impossible to do with a regular brush so you need to use either a striper polish
or a toothpick. If you do not have a striper polish in dark green, don't worry!
You can borrow the brush from a similar colored striper, or use a toothpick.
I'm using 87-8851 Holly-Day by China Glaze and borrowing a striper from another polish. |
|
 |
Step 4
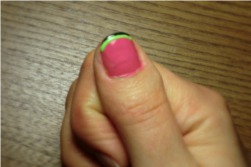
Paint another thin french tip right above the dark green, making sure there is no
space between the two. This time, your tip will be a much lighter green.
I'm borrowing the striper once again, and using 4860-02 Green With Envy by Sally Hansen
Xtreme Wear.
|
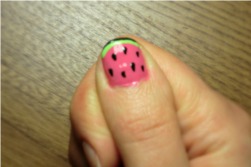 |
Step 5
Using a toothpick and any black polish paint a couple seeds on each nail.
Anywhere between 5 and 8 is a good amount. The seeds are easy to paint,
just dip your toothpick into the black (I'm using 0A-4023 Black by Ardene),
put the toothpick onto the nail and drag a bit to create the tear drop shape.
This step really makes the design come to life!
Apply a top coat onto your nails and have fun showing off your cute nails!
|


